How to Push a WordPress Staging Site to Live
Making changes to a live WordPress site is risky. A broken plugin, a bad theme update, or a failed migration can take your website down in front of real visitors. That’s why staging environments exist — and once your changes are tested and approved, you need a safe way to push a WordPress staging site […]

Making changes to a live WordPress site is risky. A broken plugin, a bad theme update, or a failed migration can take your website down in front of real visitors. That’s why staging environments exist — and once your changes are tested and approved, you need a safe way to push a WordPress staging site to live without breaking anything.
This guide walks you through exactly how to do that, the right way.
Why Pushing Staging to Live Matters
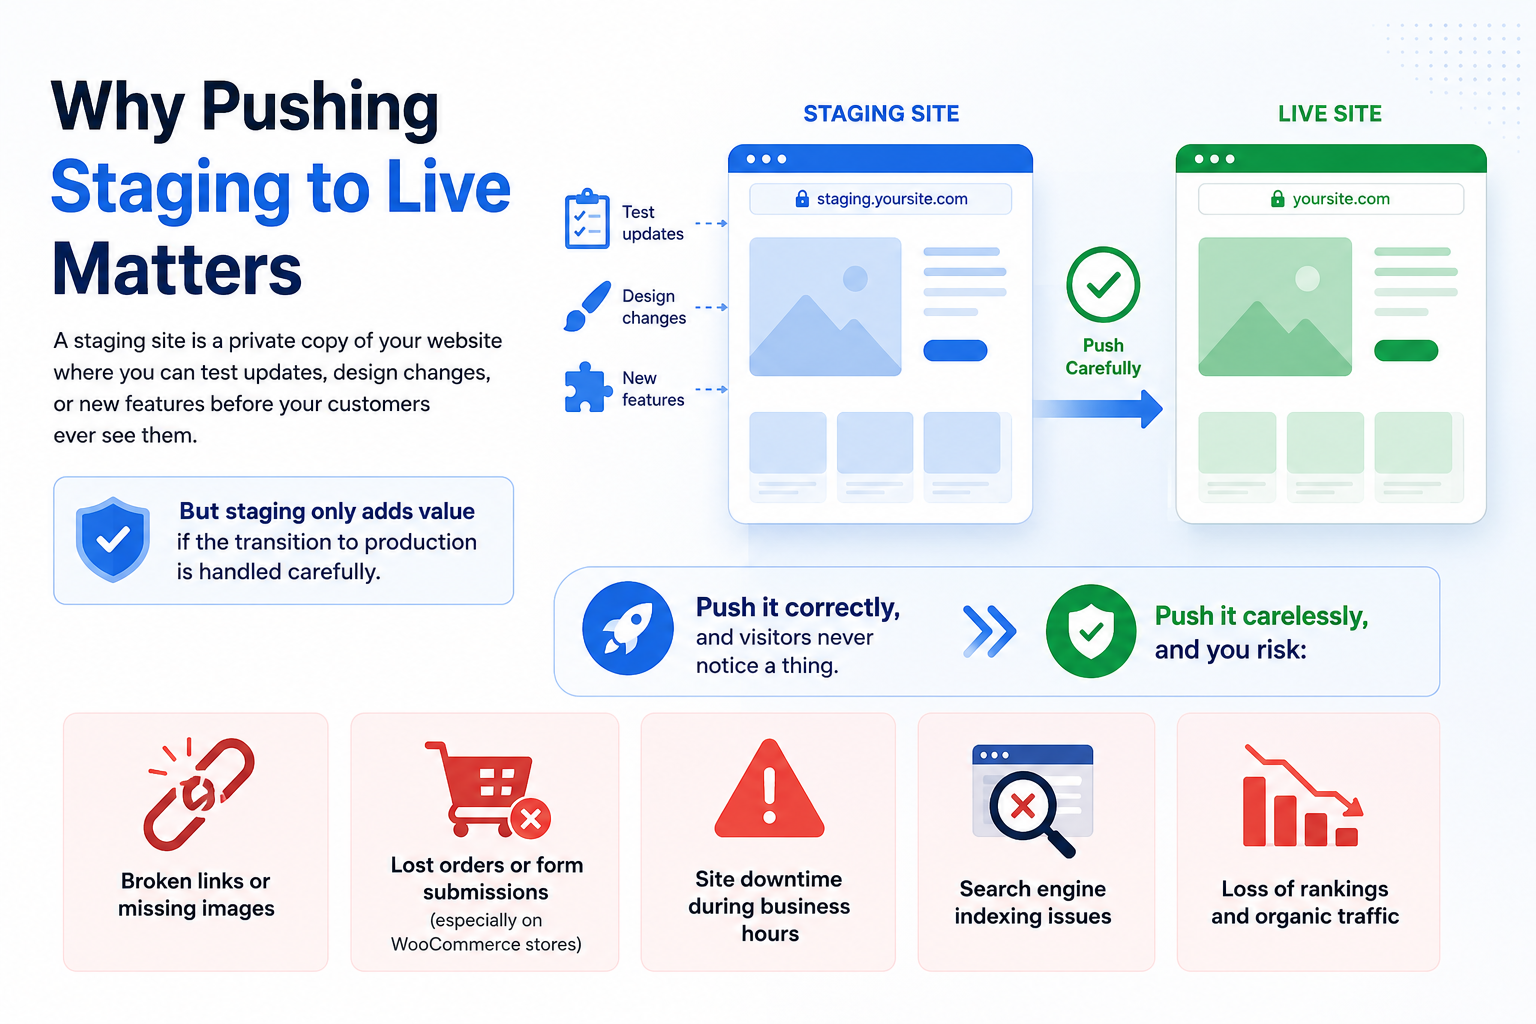
A staging site is a private copy of your website where you can test updates, design changes, or new features before your customers ever see them. But staging only adds value if the transition to production is handled carefully.
Push it correctly, and visitors never notice a thing. Push it carelessly, and you risk:
- Broken links or missing images
- Lost orders or form submissions (especially on WooCommerce stores)
- Site downtime during business hours
- Search engine indexing issues
If you’re new to staging altogether, our WordPress Staging Environment Guide covers how to set one up before you get to this step.
Before You Push: Pre-Launch Checklist
Rushing this step is the most common mistake. Confirm the following first:
- Test thoroughly – Click through key pages, forms, checkout flow (if you run WooCommerce), and any recently changed features.
- Check for staging-only settings – Search engine visibility, staging URLs, or test payment gateways should be reset for production.
- Take a fresh backup of the live site – Even a smooth push should be reversible. See our WordPress Backup Guide if you don’t already have a backup process in place.
- Note any new content added to the live site since staging was created – This matters for the next section.
Two Ways to Push Staging to Live
1. One-Click Push (Managed WordPress Hosting)
If you’re on a managed WordPress hosting plan, your host likely offers a built-in “push to live” or “deploy” button inside the hosting dashboard. This is usually the safest option, but exactly what it syncs varies by host — some push files and database together, others let you select individual components. Always check what will be overwritten before confirming the push.
Typical steps:
- Log in to your hosting dashboard.
- Open the staging tool for your site.
- Select Push to Live (or your host’s equivalent).
- Choose what to push — files only, database only, or both.
- Confirm and wait for the sync to complete.
This method is ideal for most business owners, since it removes the technical risk of manual file transfers.
2. Manual Push (Files + Database)
If your host doesn’t offer a one-click option, you can push staging to live manually. At a high level, this involves:
- Backing up the live site – files and database, before touching anything.
- Exporting the staging database and updating any staging URLs to match your live domain. Use a WordPress-aware search-and-replace tool rather than editing the database directly — WordPress stores some data in a serialized format that a plain find-and-replace can corrupt.
- Transferring the changed files (theme, plugin, or code changes) via FTP/SFTP or your hosting file manager. Be careful with the uploads folder specifically — it can hold media that exists only on the live site (added after staging was created) or only on staging, so a blind copy-over can delete files either side needs.
- Importing the updated database into production.
- Clearing caches — both any caching plugin and your host’s server-level cache — so visitors see the update immediately. Our WordPress Caching Guide covers this in more detail.
This process has more moving parts than a one-click push, and the database/URL step in particular is easy to get wrong. For the full step-by-step file and database migration process, see our WordPress Migration Guide.
Handling New Live Content
If customers placed orders, left comments, or submitted forms on the live site after staging was created, a full database push will overwrite that data. To avoid this:
- Push files and database separately, keeping the live database intact where possible.
- Or manually re-add new orders/content after the push.
- WooCommerce stores should be especially cautious here — talk to your host about safe deployment options that preserve order data.
What to Check After Pushing Staging Live
The job isn’t done when the push completes — verify the live site before moving on:
- Homepage and key landing pages load correctly
- Navigation links and images aren’t broken
- Contact forms and, if applicable, checkout/payment flow work
- Login (admin and customer accounts) still works
- Plugins and theme display as expected
- HTTPS/SSL is still enforced site-wide
- Cache is cleared and visitors see the current version
If something’s off, restore your pre-push backup and troubleshoot on staging rather than on the live site.
Common Mistakes to Avoid
- Skipping the backup – Always assume something could go wrong.
- Forgetting to update URLs – This causes broken links, missing styles, and mixed content warnings.
- Pushing during peak traffic hours – Schedule pushes during low-traffic periods.
- Not clearing cache after the push – Visitors may still see the old version.
- Overwriting new live data – Especially critical for stores and lead-generation sites.
- Ignoring SSL settings – Ensure your live site still forces HTTPS after the push. Our SSL for WordPress guide covers this if you run into mixed content issues.
Best Practices for a Smooth Push
- Push during off-peak hours.
- Always test on staging one final time immediately before pushing.
- Keep a rollback backup ready in case you need to revert.
- Notify your team before and after the push, especially for eCommerce sites.
- Consider a managed WordPress hosting plan with built-in staging tools — it removes most manual risk. Learn more in our Managed WordPress Hosting guide.